Photos of the Golf IV windows repair
As promised, here they are. Read my original post for more detail.
The driver side controls must be removed before the screws holding the door can be removed. The small piece of plastic inside the handle is easily removed by using a screwdriver or knife. The controls then easily clip off the door panel.
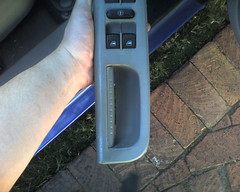
With the controls removed the three screws holding the door are easy to remove. There are also 3 small screw below the panel that must be removed. They're some kind of funny star screws. Buy the right screw driver or McGuyver it like me with you favourite swiss army knife.
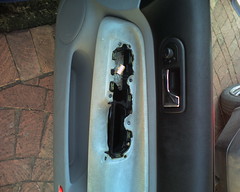
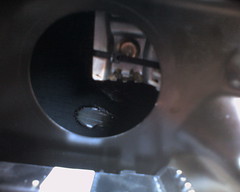
Once the panel is removed you're confronted with yet another panel. Don't fret. Leave it in place. Open the small rubber plugs (shown upper left) on both sides.
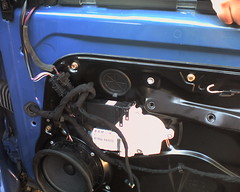
This is what the mechanism looks like (left plug) if the window is motored to the correct position. I was fortunate to have enough ramaining plastic to do some repairs.
Another view of the window mechanism. The metal is a small tab attached to the window. The plastic part is attached to a cable and moves up and down on the metal rail visible on the inside.

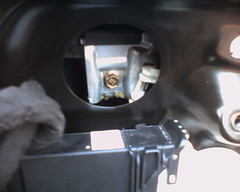
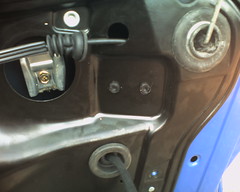
The tab on the left is the easiest to fix. I managed to cable tie the metal tab (3rd try) to the plastic mechanism.
Another view of the metal tab. After the cable tie is tight epoxy putty is used in ample quantities to fix the tab to the plastic. The epoxy putty binds to the metal, but not plastic. Use lots of putty. Make sure it does not restrict movement of the plastic clip on the rail. The electric motor is very powerful and will destroy the remained of the plastic clip if the putty gets in the way.

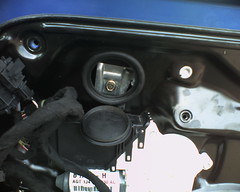
This is a shot of the mechanism on the right hand side. This one is considerably more tricky. Make sure there is enough putty in the right places. This tab is stressed the most and is in fact the point of failure for my previous 2 attempts.
Put most of the putty on the inside as this will prevent the metal tab from jumping off the inside of the plastic clip.
My putty solution worked well, but I didn't like using putty to keep my car in one piece. I found a repair kit for the window (Golfwagen) for R 560 (about $ 90 give or take) and installed it in no time by removing the bolts surrounding the inside panel. Don't worry about the subber sealant. The panel is easily pried loose with a screwdriver. The rubber seals tightly once the bolts are reapplied.
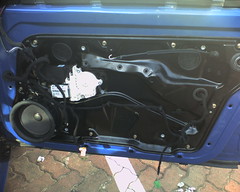
This is all the stuff I managed to remove from the door once I fixed the mechanism with the new plastic clips from the repair kit.

Just below the putty is a metal bar used to keep the tension in the springs (you'll see what I mean) from pulling on the cables on the inside of the door. The two plastic tools are used to pull the cable over one of the pulleys. Once the panel is open it takes about 10 to 15 minutes to repair the mechanism.

posted by Paul @ 2:44 PM
0 comments
![]()
![]()

0 Comments:
Post a Comment
<< Home